To turn a podcast episode into Shorts, Reels and TikToks, transcribe the episode, pick the moments where a guest says something clear or surprising, trim each one so it stands alone, frame the speaker in vertical 9:16, add large captions, and export. One episode can usually fill a week of short posts, and every clip is a way for new listeners to find the full show.
This guide is written for podcasters and the clippers who work with them. It covers video and audio-only podcasts, two-person framing, and a simple publishing plan.
Why podcast clips work
Podcasts are long by design. That is great for loyal listeners and hard for new ones. Short clips solve the discovery problem: someone sees 40 seconds of a great answer, wants more, and goes looking for the episode.
Podcasts also suit clipping better than most formats:
- Conversation produces natural hooks: questions, opinions, stories
- Guests bring their own audience, who may share clips
- A single recording session can feed several platforms at once
Before you record: make clipping easier
If you control the recording, a few small choices save time later:
- Record each speaker on a separate camera or at least clearly framed
- Record in the highest resolution you can, because vertical crops lose pixels
- Use good microphones, since captions and retention both depend on audio
- Ask guests to answer in full sentences ("The mistake I made was..." rather than "Yeah, that")
If you are clipping someone else's show, you do not control any of this, so start with the best source file available.
Step 1: Import and transcribe the episode
Start from the original video file if possible. If the episode is already on YouTube, a link works too in some tools.
In Cuplikin, you can import a local video file (MP4, MOV or MKV on Mac; Photos or Files on iPhone) or paste a supported URL such as YouTube, which is downloaded through Cuplikin's service. Transcription runs on-device or with Cuplikin Cloud and gives you a timestamped transcript.
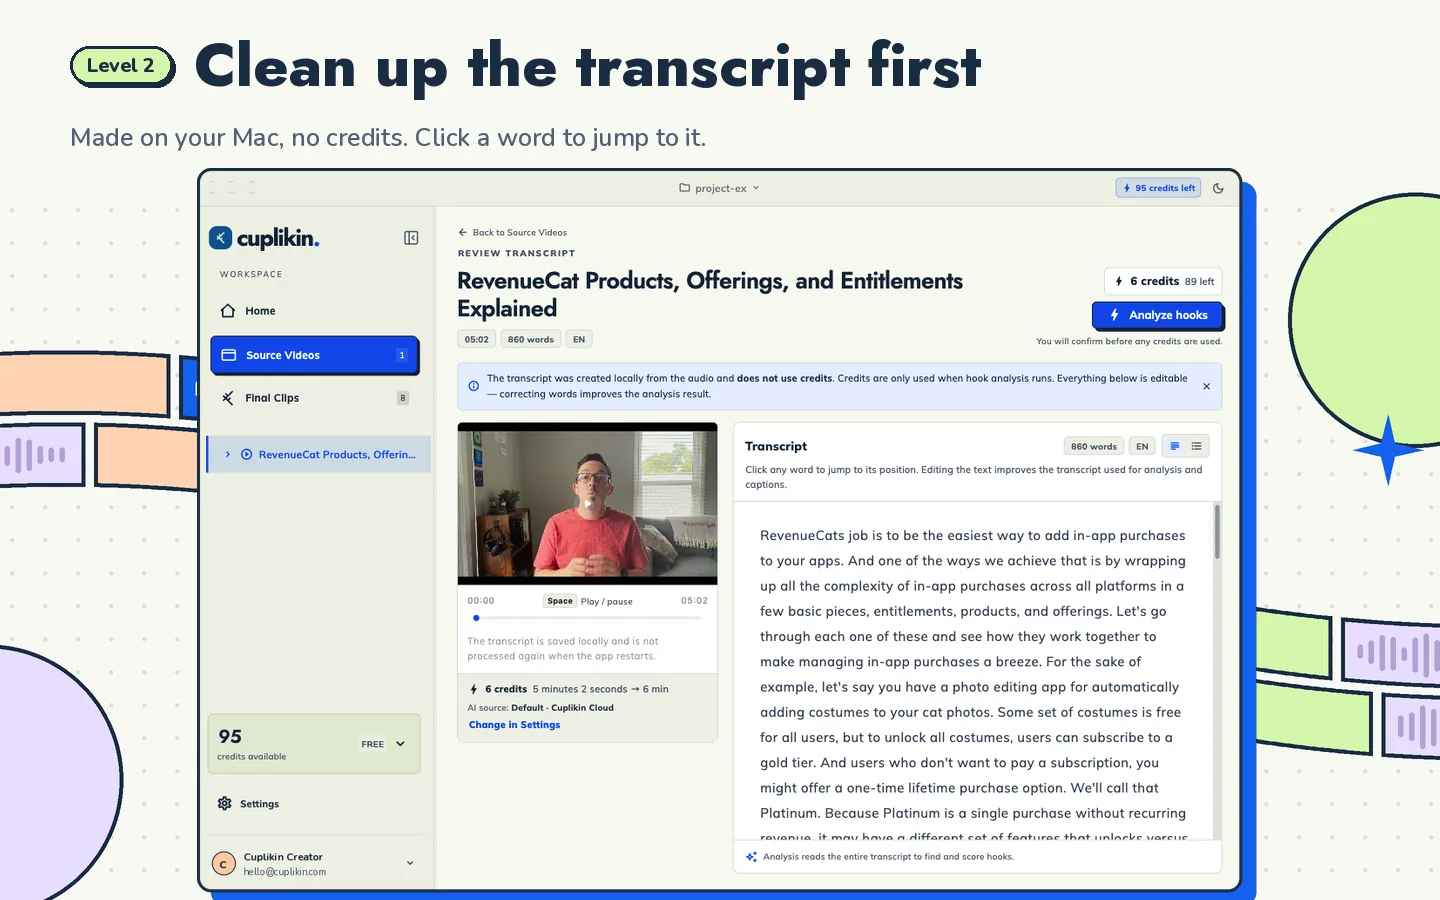
Review the transcript while the episode plays. Podcast transcripts often get guest names, brand names and slang wrong. Fix them now. In Cuplikin, you can click a word to jump to that moment and correct words before continuing.
Step 2: Pick the moments worth clipping
Good podcast clips usually come from:
- A guest's strongest opinion. Clear, confident, maybe a little controversial.
- A personal story. Especially ones with a turning point or a lesson.
- A practical answer. "Here is exactly how I would do it."
- A funny exchange. Chemistry between host and guest is shareable.
- A disagreement. Two views on one question keeps people watching.
Skip moments that depend on earlier parts of the conversation. If the clip needs "as we said earlier", it probably will not work alone.
For a complete method, read how to find the best hooks in a long video.
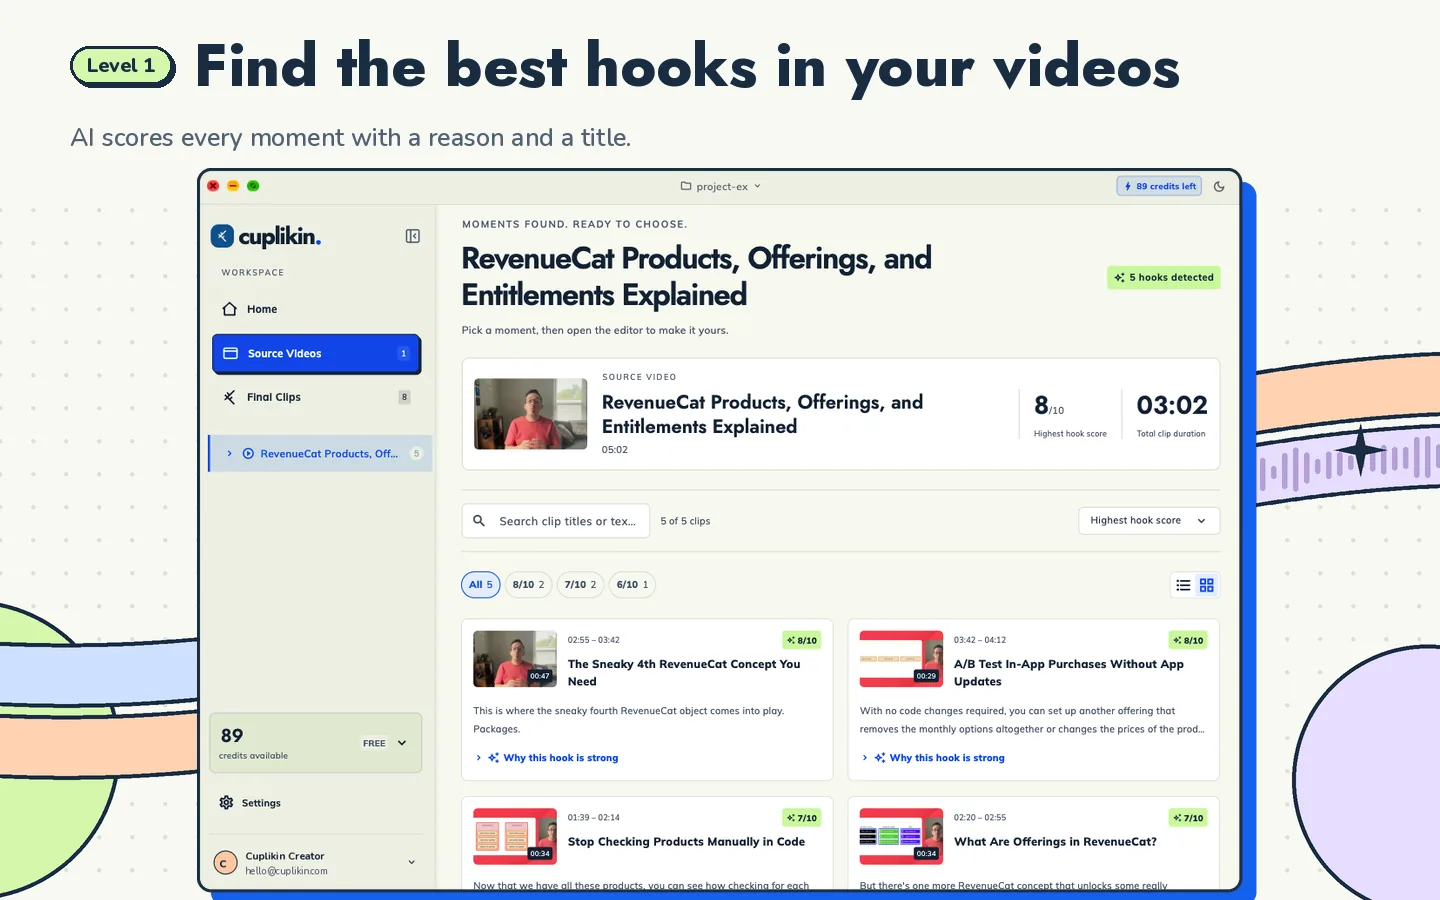
Cuplikin's AI hook detection can take the first pass. It finds engaging segments, scores each from 1 to 10, gives a reason why the hook is strong, and suggests a title idea. You decide which ones to use; scores help you judge ideas but do not guarantee views.
Step 3: Trim so each clip stands alone
Podcast clips often fail in the first two seconds because they start with "So yeah" or a half-finished thought. When trimming:
- Start on the line that grabs attention, even if it is mid-answer.
- Cut the host's long question down to its key words, or remove it if the answer is clear alone.
- Remove long pauses and filler.
- End right after the payoff line.
Check the platform's current length limit before exporting, and let the idea decide the length.
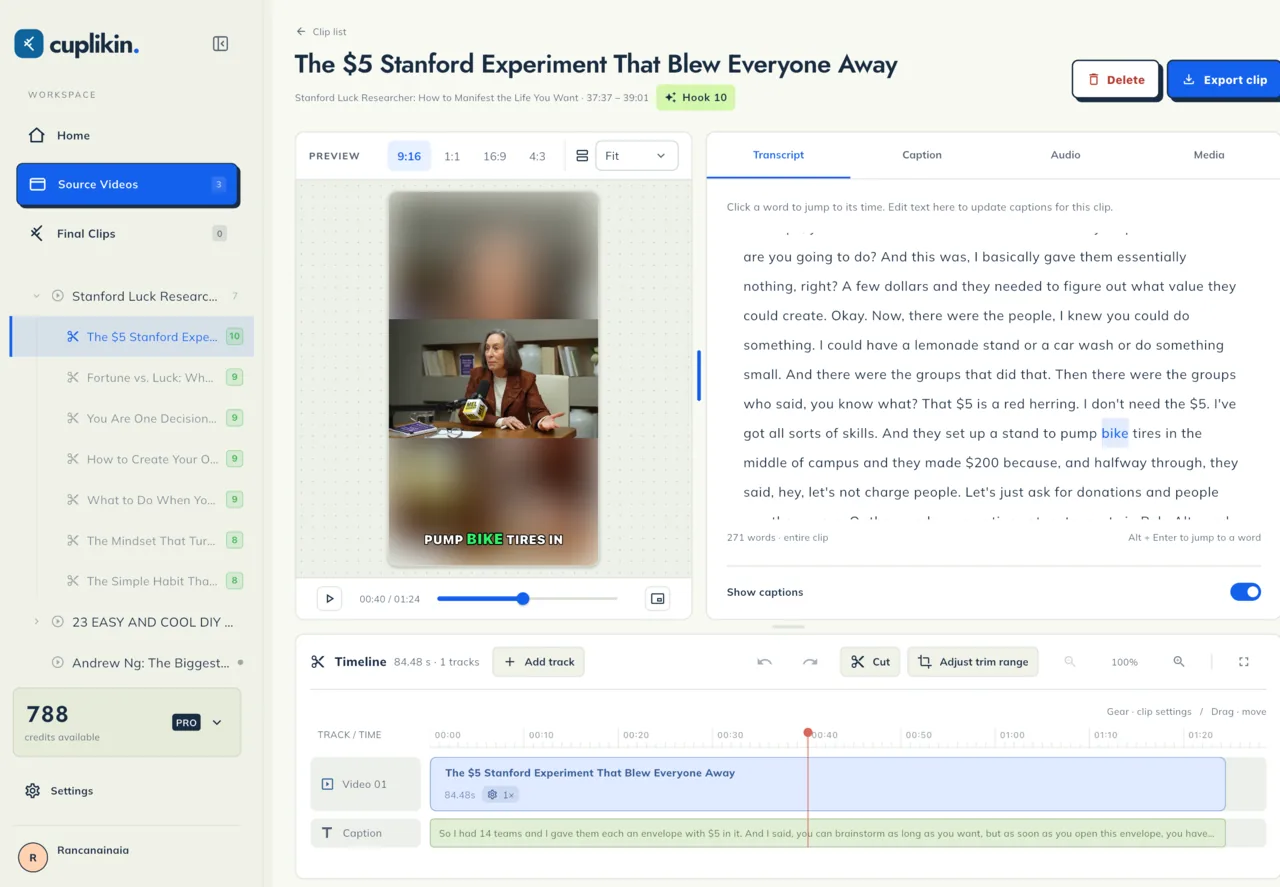
In Cuplikin, you trim on a timeline, and editing the transcript word by word updates the captions to match.
Step 4: Frame two speakers in vertical video
This is where podcast clipping differs from other formats. A wide two-shot looks tiny in 9:16. Your options:
- Single speaker crop. Crop tightly on whoever is talking. Best for answers and stories.
- Two-panel layout. Stack the host and guest, one on top of the other. Best for back-and-forth exchanges.
- Square or 4:3 inside vertical. Keep more of the original frame with captions above or below. Useful when the setting matters.
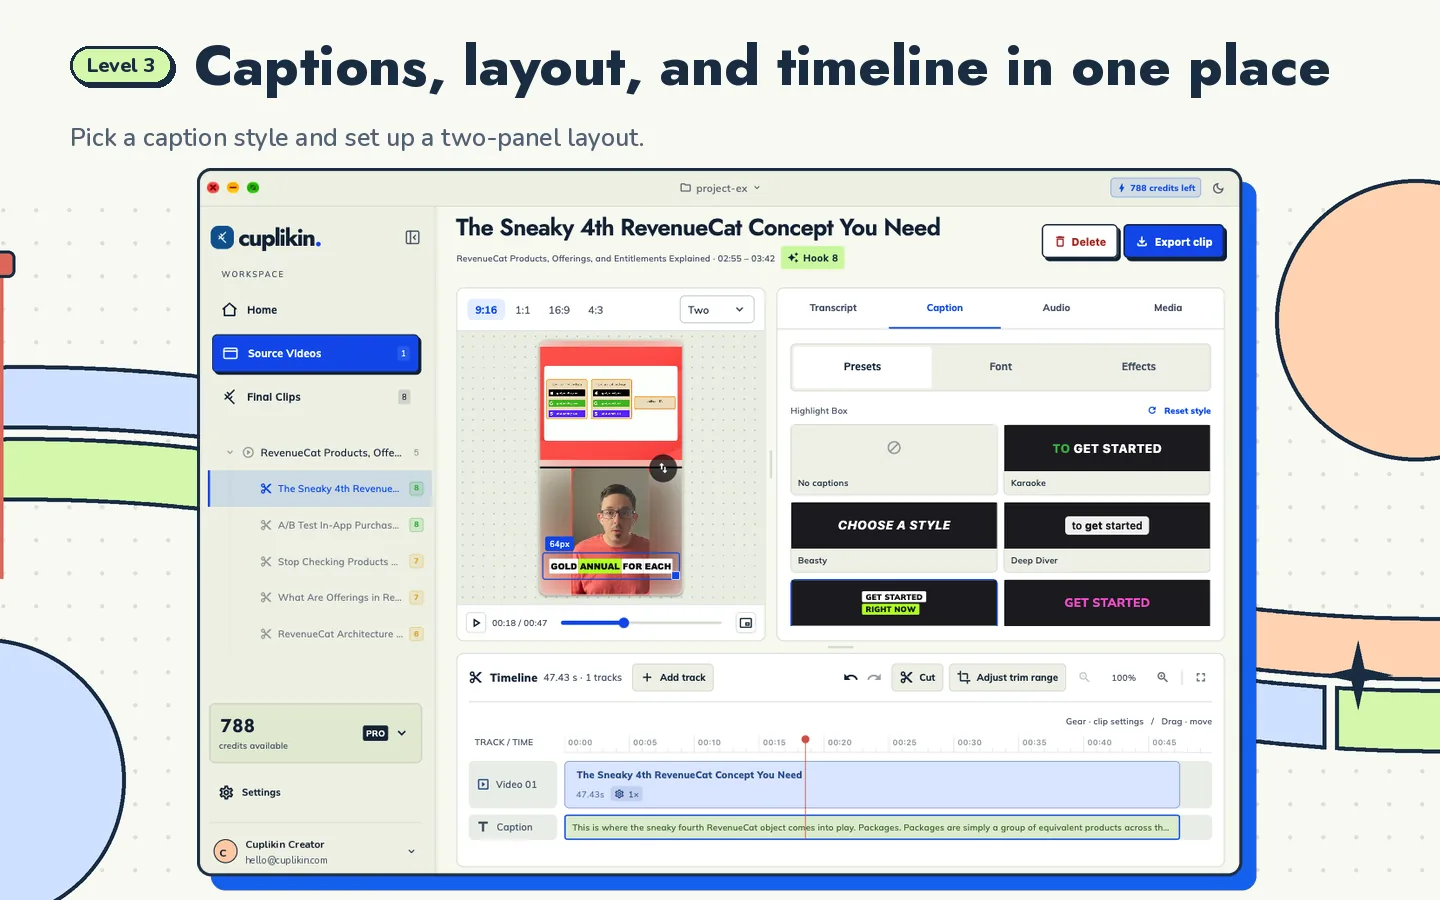
Cuplikin supports 9:16, 1:1, 16:9 and 4:3 aspect ratios (plus a 9:8 crop on Mac), Fill or Fit, and a two-panel layout. You can crop each panel to frame a speaker's face and pinch to zoom.
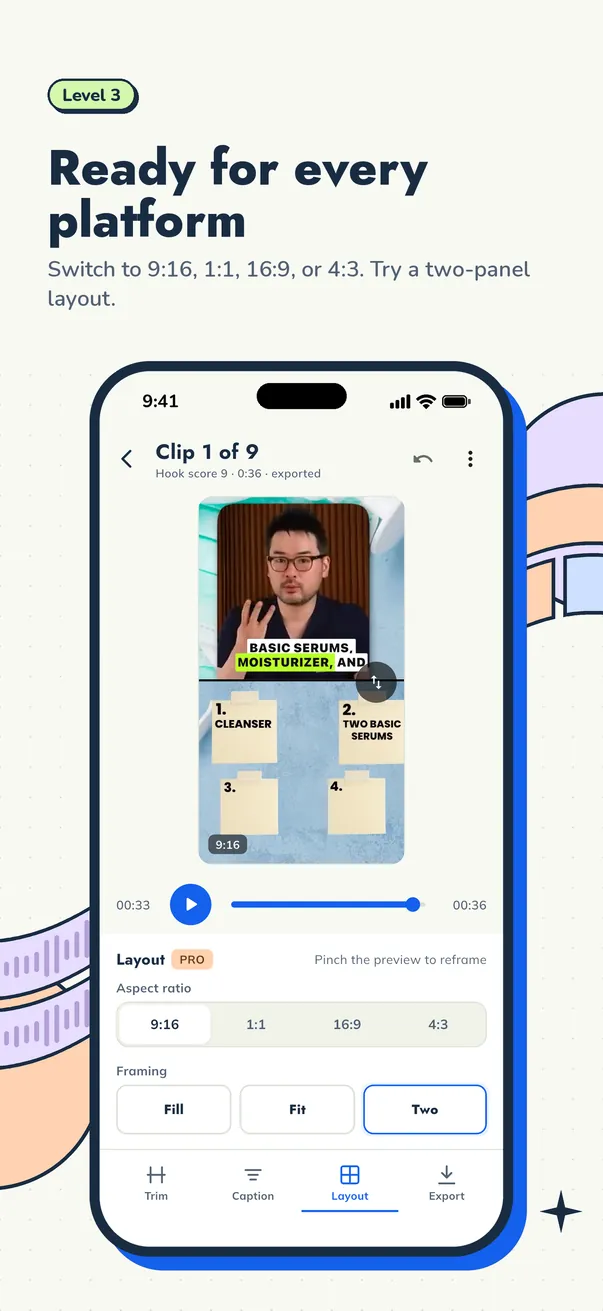
For more detail, see how to convert horizontal video to vertical without losing the speaker.
Step 5: Add captions
Captions matter even more for podcasts, because the content is almost all speech. Keep them big, short and high-contrast, and keep them clear of the platform's buttons. Word-by-word highlighting helps viewers follow fast talkers.
Cuplikin includes caption presets such as Karaoke, Beasty, Deep Diver and Highlight Box, with adjustable size and position (top, center or bottom) and word-by-word highlight. Read auto captions for short videos to choose a style.
Step 6: Export and write titles
Export in vertical at the standard 1080×1920, or higher if your source allows. Write a title and caption for each clip that sells the idea, not the episode number. Mention the guest when their name helps, and point viewers to the full episode.
Cuplikin exports up to 4K with your choice of resolution, frame rate, bitrate and codec, and lets you write a title and social caption for each clip. There is no watermark.
What about audio-only podcasts?
If your podcast has no video, you can still make clips, but you need something to look at. Common approaches are a static image of the show artwork or guest photo, combined with large animated captions that carry the content. Cuplikin's editor lets you add image and audio tracks, so you can build a visual around the audio.
A weekly publishing plan for one episode
| Day | Clip type |
|---|---|
| Monday | Strongest opinion from the guest |
| Tuesday | Practical tip or how-to answer |
| Wednesday | Personal story |
| Thursday | Funny or surprising exchange |
| Friday | Second-best opinion, plus a nudge to the full episode |
Adjust it to what your audience responds to. For the full process, see the pillar guide on how to turn long videos into short clips. If you want to clip podcasts for other creators, read how to become a video clipper.
FAQ
How many clips should I make from one podcast episode?
Start with three to five strong clips per episode. That is enough for a steady posting schedule without forcing weak moments. If an episode is unusually good, make more.
Should I post the same podcast clip on TikTok, Reels and Shorts?
Many creators post the same vertical clip on all three, then adjust the caption and title for each platform. Check each platform's current rules and length limits before you post.
How do I clip a podcast with two people on camera?
Use a single-speaker crop for answers and a two-panel layout for exchanges. In Cuplikin, the two-panel layout stacks two framed views in 9:16, and you can crop each panel to the speaker's face.
Try it with Cuplikin
Cuplikin takes a podcast episode from import to finished clips: transcription, AI hook suggestions, trimming, caption presets, two-panel framing and export up to 4K, with no watermark. Projects and media stay on your device. It is free to download for Mac, iPhone, iPad and Android. Download Cuplikin.