To convert a horizontal video to vertical without losing the speaker, don't use a plain center crop. Pick one of three methods instead: crop to the speaker's face in a 9:16 frame, stack a two-panel layout (for example slides on top and the speaker below), or fit the whole wide frame inside the vertical canvas. Which one is right depends on what's happening in the shot.
Most podcasts, interviews, webinars and lessons are recorded in 16:9. TikTok, Instagram Reels and YouTube Shorts are built for 9:16. This guide covers how to move between the two so the person talking always stays in view.
Why a center crop usually fails
A 9:16 frame cut from a 16:9 video only keeps about a third of the original width. A center crop keeps the middle third, which works when one person sits in the middle of the shot.
It often fails when:
- Two hosts sit side by side. The middle of the frame is the table, a microphone or the gap between them.
- The speaker is off-center. Many interview shots use the rule of thirds, so the face sits on the left or right.
- There are slides or a screen share. The slide gets cut in half and the speaker's camera box ends up out of frame.
- People move. Someone leans back or walks to a whiteboard and drops out of the crop.
That's why reframing needs a decision for each clip.
Method 1: Crop to the speaker's face
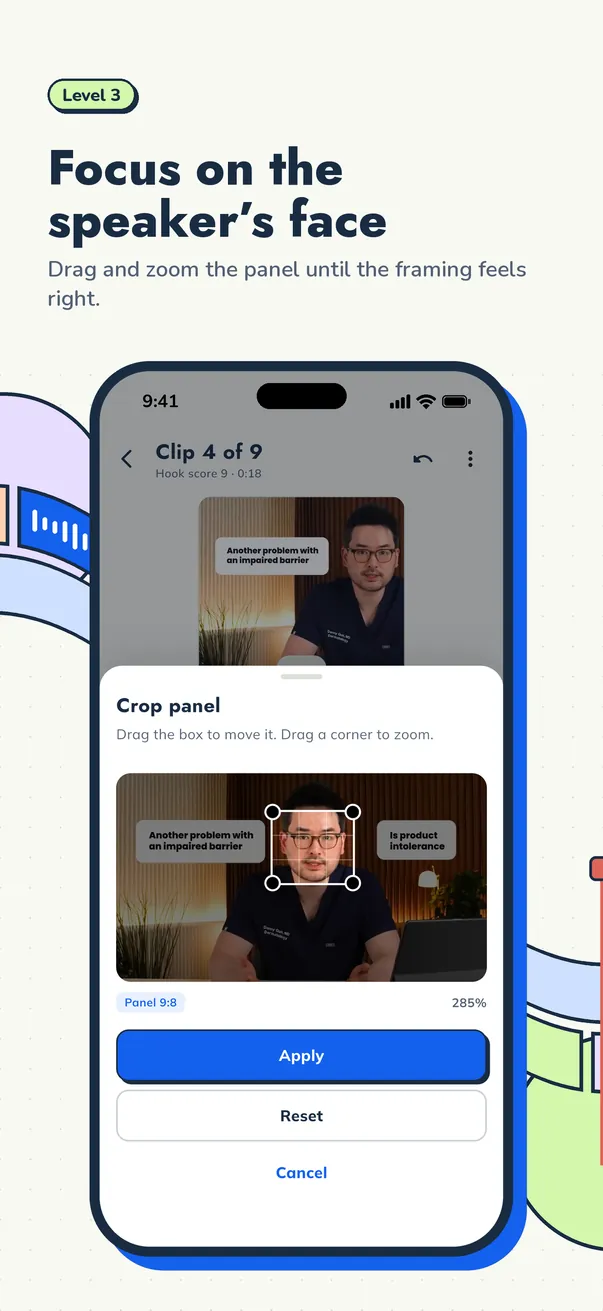
For a single person talking, cropping to their face is the most natural-looking option. The video fills the whole vertical screen and the speaker is large and clear.
How to do it well:
- Set the frame to 9:16 with Fill, so the video covers the whole canvas.
- Move the crop so the speaker's eyes sit roughly in the upper third of the frame.
- Leave a little room above the head. Don't push the face to the top edge, where app buttons appear.
- Zoom in only as far as the source quality allows. Zooming too far into a 1080p recording makes the face soft.
- Play the whole clip and check that the speaker doesn't move out of the crop.
Method 2: Use a two-panel layout
A two-panel layout stacks two areas of the original frame on top of each other inside one 9:16 clip. It's the most useful option for:
- Webinars and lessons: slides on top, speaker below.
- Two-person podcasts: host on top, guest below.
- Product demos: screen on top, presenter's face below.
- Reaction or commentary: the content on top, the reaction below.
Frame each panel for its job, the slide in one and the face in the other. Viewers get the context and the person in a single frame.
Tips for two-panel clips:
- Put the thing viewers need to read (slides, screen) in the top panel and the face in the bottom panel, or the other way round if the face matters more for the hook.
- Keep captions in the gap between the panels or over the lower panel, where they won't cover slide text.
- Use a two-panel layout only when both panels add something. If the top panel is a blank slide, crop to the speaker instead.
Method 3: Fit the whole frame
Sometimes every part of the wide shot matters, like a group panel, a whiteboard or a wide demo. In that case use Fit. The full 16:9 frame stays visible inside the 9:16 canvas with space above and below.
Use that space on purpose. Put a short title above the video and large captions below it, so the clip still feels made for vertical.
Fit is also a good fallback when the source resolution is too low to crop in closely.
Which method should you use?
| Situation | Best method |
|---|---|
| One person talking to camera | Crop to the speaker |
| Two people in one wide shot | Two-panel layout |
| Slides or screen share plus a speaker | Two-panel layout |
| Wide group shot where everyone matters | Fit |
| Low-resolution source | Fit, or a gentle crop |
If you want something other than 9:16, for example a square clip for a feed, read our guide to aspect ratios for TikTok, Reels and Shorts.
How to reframe horizontal video in Cuplikin
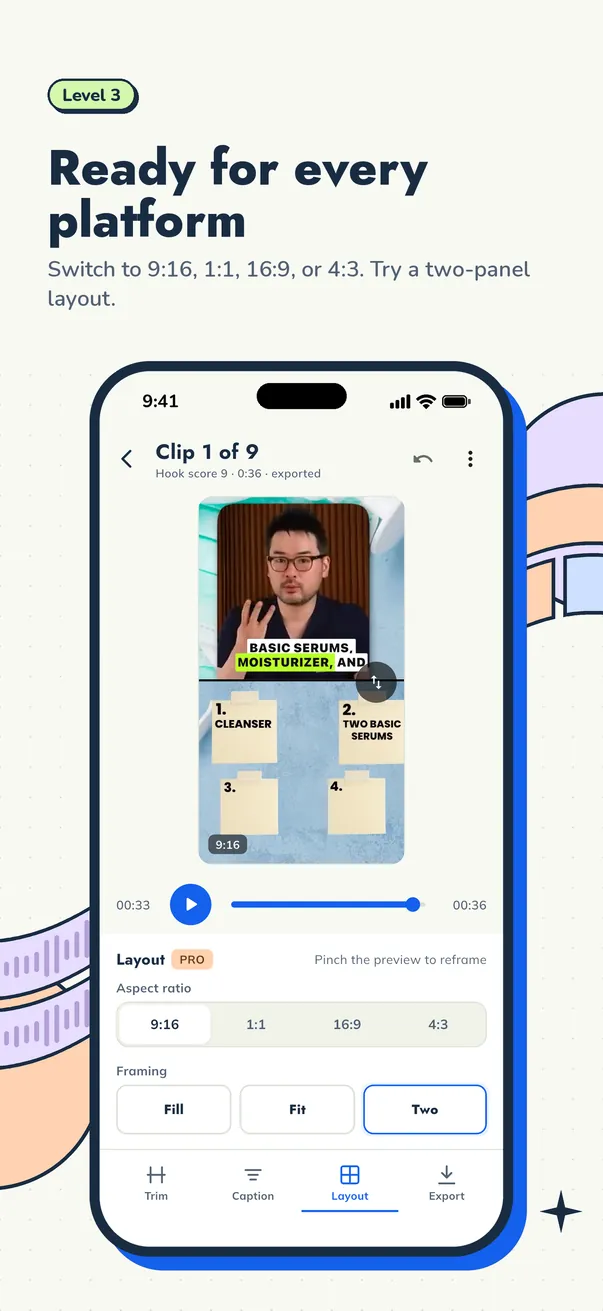
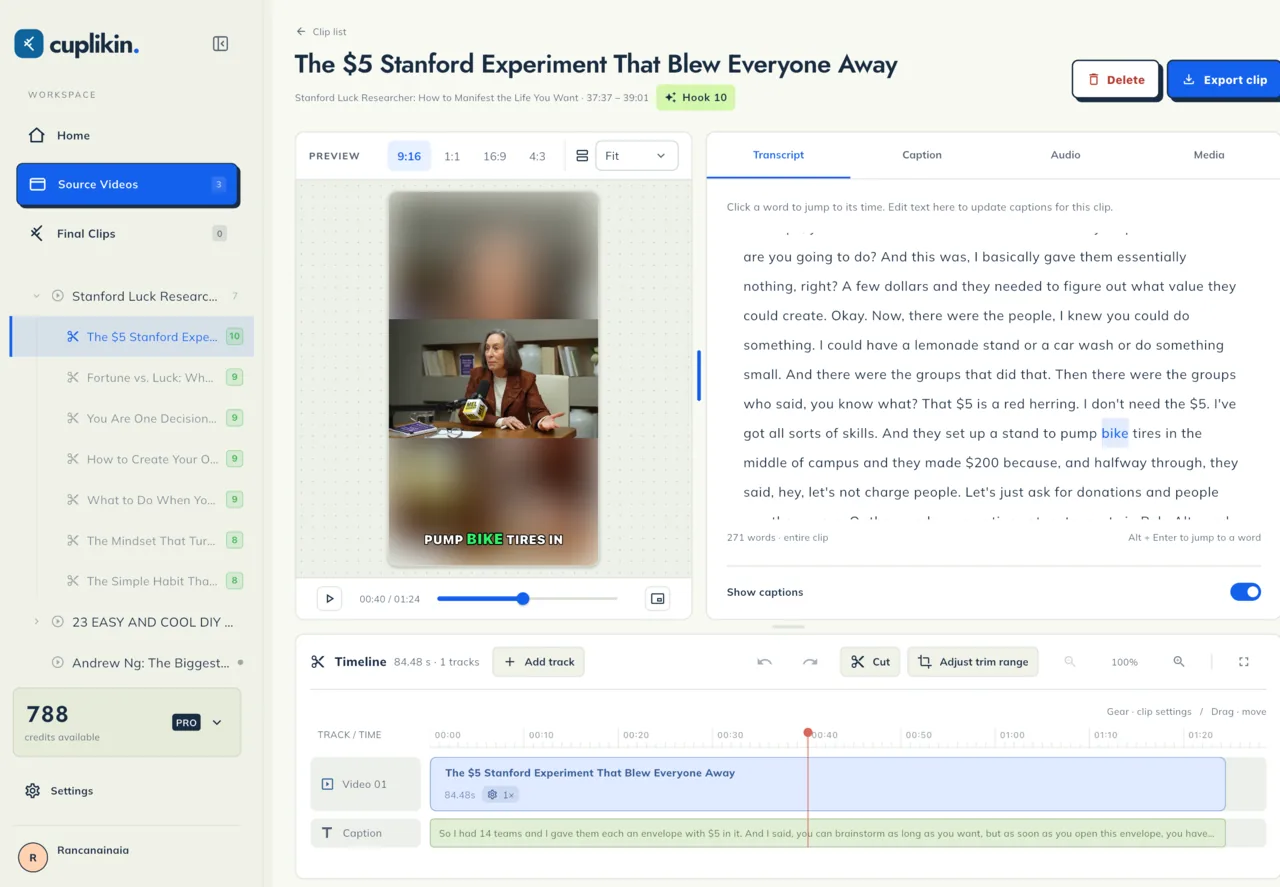
In Cuplikin, reframing happens in the editor after the AI has found your strongest moments and you've corrected the transcript. For each clip you can:
- Choose an aspect ratio: 9:16, 1:1, 16:9 or 4:3, plus a 9:8 crop on Mac.
- Switch between Fill and Fit.
- Turn on a two-panel layout, for example slides on top and the speaker below.
- Use the crop panel to frame the speaker's face, with pinch to zoom on phones.
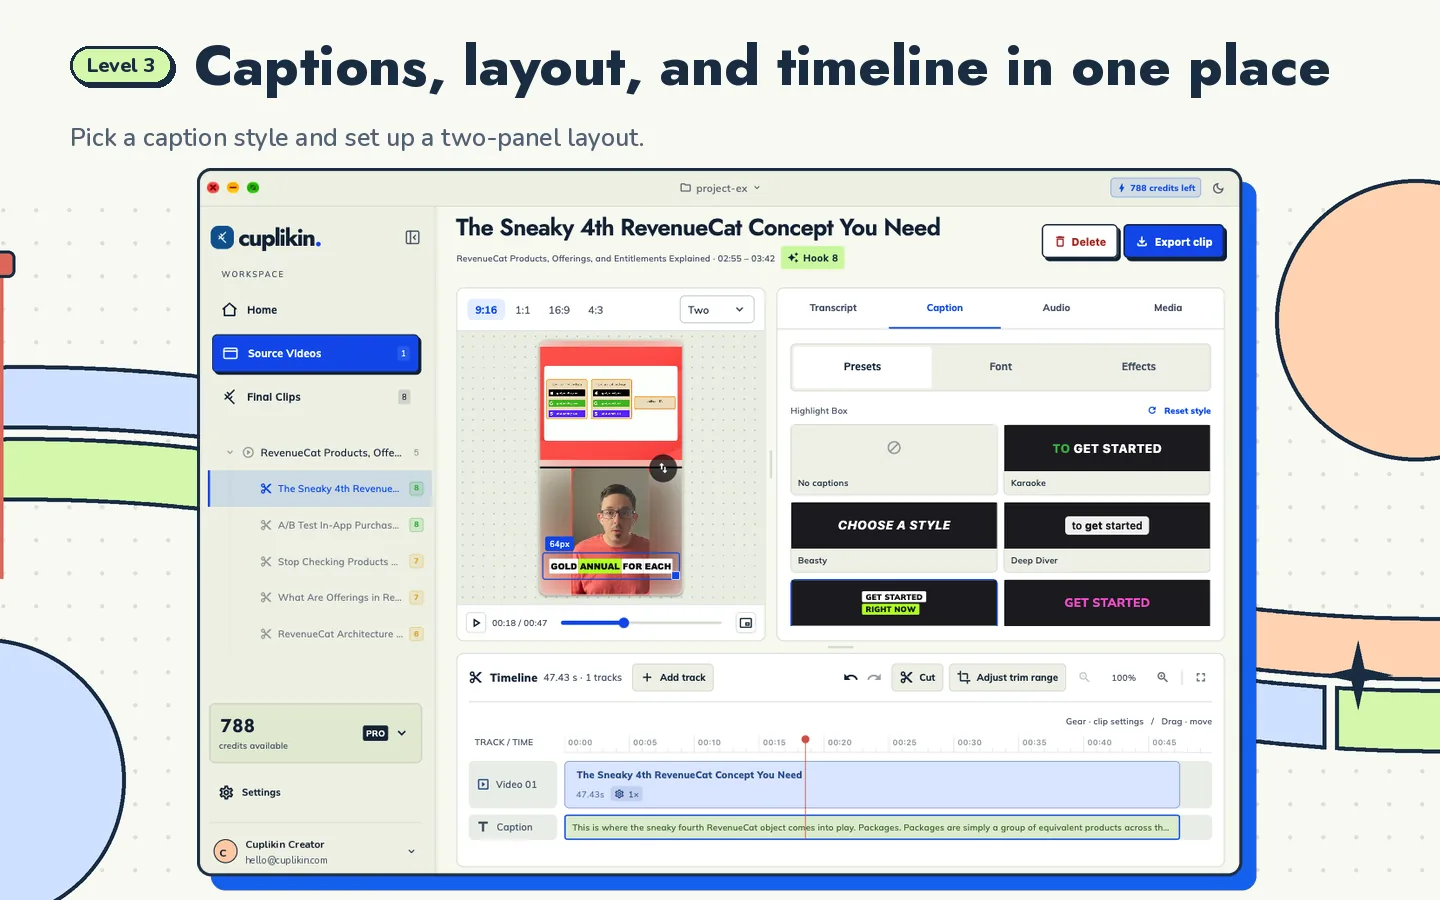
The preview shows captions, layout and the timeline together, so you can check framing across the whole clip before you export. Captions come from your timestamped transcript, so editing a word in the transcript updates the caption too. Our guide to auto captions for short videos has more on placing captions in vertical clips.
When the framing looks right, export up to 4K. The export settings guide explains which resolution, frame rate and bitrate to choose.
A quick reframing checklist
- The speaker's face is visible for the whole clip, not just the first frame.
- Eyes sit around the upper third, with nothing important at the very top or bottom.
- Slides or screen content are readable on a phone.
- Captions don't cover faces or slide text.
- The zoom isn't so tight that the face looks soft.
Reframing is one step in turning a long recording into short clips. For the whole workflow, start with the pillar guide: how to turn long videos into short clips.
FAQ
How do I convert 16:9 video to 9:16 without cropping out people?
Instead of a center crop, either move the crop to follow the person speaking, use a two-panel layout that stacks two areas of the frame, or use Fit to keep the whole 16:9 frame visible inside the vertical canvas.
What is a two-panel layout?
A two-panel layout splits a vertical 9:16 frame into two stacked sections, each showing a different crop of the original video. A common setup is slides or a screen share on top and the speaker's face below.
Does converting horizontal video to vertical lower the quality?
Cropping uses fewer of the original pixels, so a tight crop on a low-resolution source can look soft. Record at a higher resolution when you can, avoid zooming too far, and use Fit when the source is too small to crop.
Try it with Cuplikin
Cuplikin lets you crop to the speaker, stack a two-panel layout or fit the full frame, then export vertical clips up to 4K with no watermark. Projects and media stay on your device. Download Cuplikin for Mac, iPhone, iPad or Android.